Sunday, May 19, 2019

Mt Gozaisho

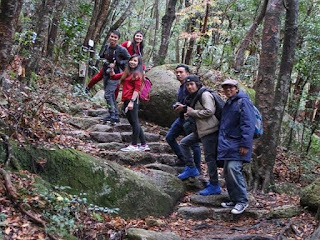
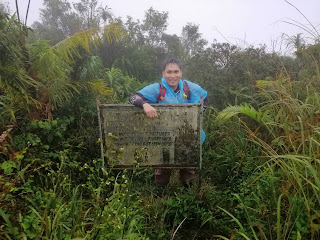
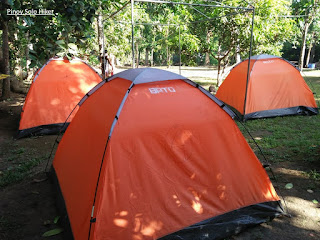
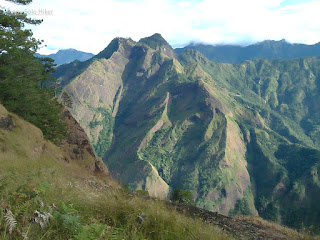
Standing at 3,969ft above sea level, Mount Gozaisho is the highest peak in the Suzuka Mountain ranges which is an hour travel from Nagoya, Japan. There are two options to reach the summit. The first one is by trekking up along the mountain by following the established trail which can be reached in two or three hours depending on one's pacing. And the other option is via a cable car known as the Gozaisho Ropeway which is Japan's longest ropeway which only takes 12 minutes to arrive at the summit.

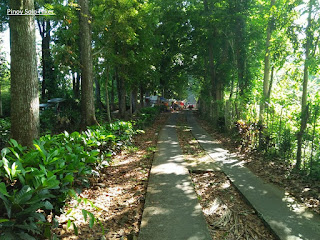
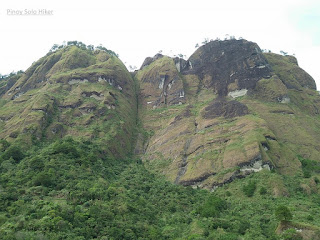
Each route offers a distinct experience and view in itself. The walking trail passes through a forested part with moderate assault that requires the use of bamboo ladders, ropes and chains to help one cross ravines and passed by jagged rocks with sheer drops on some portions. On the otherhand, the cable car travels over the treetops which offers a birds-eye view of cliffs, crags and rock formations.

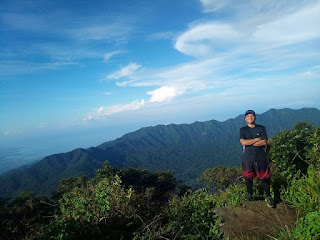
On a clear day, Mt Gozaisho's summit offers a commanding view of Yokkaichi, Ise Bay and the Japan Alps, the Lake Biwa and, even the faint Mount Fuji which is nearly 300 km away. The summit also marks the border between Mie Prefecture and Shiga and the center of the Suzuka Quasi National Park. 

Depending on the season, during winter the view is mostly white and silver shining frost covered trees with snow-laden ski grounds. During spring it is filled with fresh cherry blossom and bright pink azaleas. While during summer the whole place is filled with lush green vegetation and the autumn season offers a stunning red, yellow and gold of the fallen leaves. Whatever season, Gozaisho offers a different experience all year round.

Pinoy Solo Hiker - Mt Gozaisho

Pinoy Solo Hiker - Mt Gozaisho

Pinoy Solo Hiker - Mt Gozaisho

Pinoy Solo Hiker - Mt Gozaisho

Pinoy Solo Hiker - Mt Gozaisho

Pinoy Solo Hiker - Mt Gozaisho

Pinoy Solo Hiker - Mt Gozaisho

How to Get There:
1. From Osaka, take the Kintetsu Ltd Exp (usually the Urban Liner from Osaka Namba, Uehonmachi, or Tsuruhashi) to Yokkaichi, then change to another Kintetsu train to Yunoyama Onsen.
2. Once you get there, you can take a long walk (4km), take a taxi, or bus to the Ropeway (there are two options via trekking or ropeway).

Tickets can be bought at ticketing offices and stations. Go to Osaka Namba, Uehonmachi, or Tsuruhashi, or you can also buy from ticket vending machines.

Try to visit their website: http://www.gozaisho.co.jp/en/access/#train

***This blog article was based on the pictures and narration shared by my brother-in-law (Rommel Garcia) that made this write-up possible.

Thursday, May 2, 2019

Mt. Balagbag

This write up was long overdue, we went to Mt Balagbag last December 2017 when "Garfield" the cute and floppy cat was still around who tirelessly entertained hikers and visitors alike.

Mt. Balagbag is a great hiking destination within the proximity of Manila which is located in San Jose Delmonte in Bulacan. Balagbag means “not correctly aligned or positioned” maybe that's how it got its name since it is located between the boundaries of Rodriguez, Rizal and SJD, Bulacan.
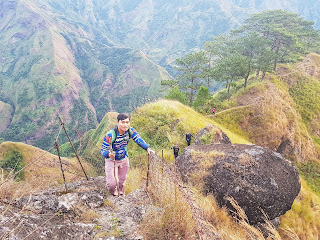
Because of its moderate slope, wide and established trail, it has become a favourite training ground for those who are beginning in their journey as a trail runner. Moreover, it is also one of the all-time favourites for those who are introduced into hiking since this is very accessible for commuters and can be hiked at one's convenience.  

The start of the trek commences from Licao-Licao (one has the option to ride a trike which can cut the trekking time by 40 minutes). The trail passes a cemented pavement with gradual ascent until reaching the first registration point, from there on the trail leads into a pathway comprised of dirt and rocks ideal for mountain bikers which then leads into an open grassland with established trail ideal for runners, bikers and sightseers with a total distance of 5.8km all the way to the summit and an elevation gain of 1500ft. The summit offers a commanding view of Sierra Madre mountain ranges, Mt Oriod and even Metro Manila can be seen in the horizon. During that time we were welcomed by the cute and cuddly "Garfield the Cat", we were sad to learn that he is no longer around today.

Pinoy Solo Hiker - Mt Balagbag

Pinoy Solo Hiker - Mt Balagbag
Shooting place for "Goyo ang Batang Heneral"

Pinoy Solo Hiker - Mt Balagbag
With the Team Una

Pinoy Solo Hiker - Mt Balagbag

Pinoy Solo Hiker - Mt Balagbag
Campsite

Pinoy Solo Hiker - Mt Balagbag
Gwapo be like

Pinoy Solo Hiker - Mt Balagbag

Pinoy Solo Hiker - Mt Balagbag

Pinoy Solo Hiker - Mt Balagbag
Garfield the Cat

Pinoy Solo Hiker - Mt Balagbag
Wazzupp Nigga?
How to Get There:
1. From Cubao, ride a bus bound for Tungko (alight in Jollibee).
2. From Jollibee Tungko, ride a jeep bound for Licao-Licao
3. You can ride trikes towards Mt Balagbag or you can take a walk (we walk of course).

Tuesday, April 2, 2019

Mt Natib

Mount Natib is the highest peak in the entire Natib Caldera System situated in the Bataan Natural Park which stands at 4222ft above sea level located in the town of Orani. The mountain together with the adjacent surrounding is a protected area which was first declared as Bataan National Park in 1945.

The trail of Mt. Natib starts in the outpost in Brgy Tala which also serves as the registration for hikers. The hike commences through a cemented trail which is about 3km till reaching the viewing deck. From there on, one would enter a grassland and a very established woodland which is about 2km until reaching the fork that leads to Pasukulan Falls. The trail is continuously a forested woodland with moderate ascent for another 1.8km until reaching the foot of Mt Natib where the real challenge begins. 

The final assault is characterized by a steep trail which requires technical climbing on some part with a distance of 2.1km and a 1300ft elevation gain for a total of 2300ft elevation gain and a total distance of 8.9km to reach the summit from the jump-off point. It also includes a series of 10 separate rope segments through vertical walls. Since there was a surge of Typhoon Usman when we hiked Mt Natib, the rocks were all slippery making the difficulty level a notch higher with Limatik fests everywhere, almost freezing temperature and of course zero visibility at the summit which is covered by a small patch of grassland. There are also are boulders with inscribed names of American expeditionary forces who climbed the peak way back the 1930s.

On a clear day, the summit offers a commanding view of the entire Bataan Natural Park, part of the province’s eastern and western coast, Subic Bay Freeport Zone on the northwest and a view of the entire northerly slope of Mariveles Caldera System. 

Pinoy Solo HIker - Mt Natib
Mt Natib's summit on a clear day (Photo Credit: Rocky Casera)

Pinoy Solo HIker - Mt Natib
1 of 10 rope segments

Pinoy Solo HIker - Mt Natib
At the summit

Pinoy Solo HIker - Mt Natib
Walang clearing sa summit

Pinoy Solo HIker - Mt Natib
The fork to Pasukulan falls

Pinoy Solo HIker - Mt Natib
Photo credit: Christian Vergara

Pinoy Solo HIker - Mt Natib
Photo Credit: Ms. Jhing

Pinoy Solo HIker - Mt Natib
Viewing deck

How to Get There:
1. Ride a bus bound for Orani, Bataan
2. Tell the driver to drop you off at Orani Crossing.
3. Ride a trike bound to Brgy. Tala (Registration)

*** I joined an event organized by Rocky Casera of Rocky Outdoor

Thursday, March 21, 2019

Bato Springs

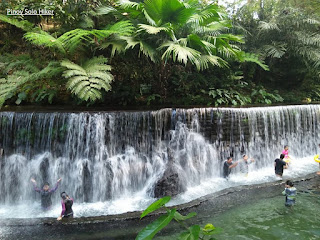
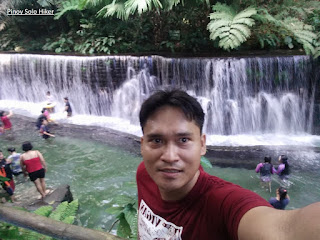
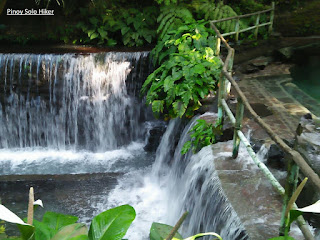
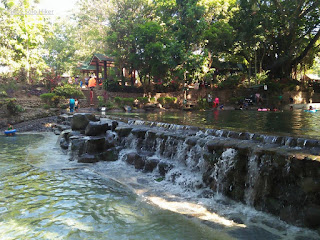
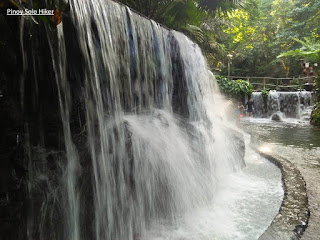
Located in San Pablo City in Laguna, Bato Springs is often described as a resort amidst in the middle of a jungle which makes it truly one of a kind. According to the locals, it was originally a series of flowing river and spring which came from Mt. Banahaw. It was then developed into a resort in 1981 together with its unique artificial waterfalls and river-fed cold swimming pools.

Because of its proximity from Manila (2-hour drive without traffic), Bato Springs has become a perfect getaway, especially during summer because of its crystal clear and refreshingly cold water making it an ideal retreat at an affordable price and commune with nature at the same time.

Pinoy Solo Hiker - Bato Springs

Pinoy Solo Hiker - Bato Springs
Selfie is life most especially if you are a lone traveller

Pinoy Solo Hiker - Bato Springs

Pinoy Solo Hiker - Bato Springs

Pinoy Solo Hiker - Bato Springs

Pinoy Solo Hiker - Bato Springs

Pinoy Solo Hiker - Bato Springs
Tents are also available for rent

Pinoy Solo Hiker - Bato Springs

How to Get There:
1. From San Pablo City (Cathedral)
2. Ride a tricycle to Goldilocks, or you can walk (jeepney terminal bound to Brgy. Cristobal).
3. Ride a jeepney going to San Cristobal. 
4. Tell the driver to drop you at Bato Springs (You still have to walk several meters).

Monday, March 11, 2019

Mt Kabunian

This blog post was already more than a year overdue, but now I just had the time to write our Mt. Kabunian hike which happened last December of 2017, so here it goes.

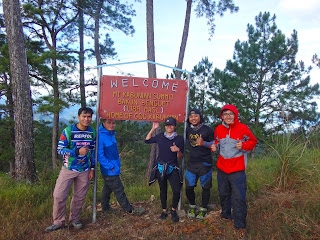
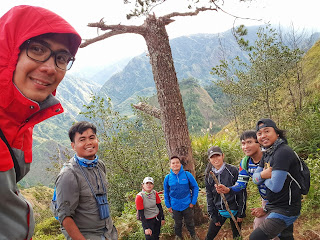
Mt Kabunian is part of the Bakun Trio mountains which is popularly known as the "home of the kankana-ey god, Kabunian." According to a local legend, "Kabunian", the legendary head of the gods always left golden plates of meat and rice on the trail to feed the tired and hungry people scaling the mountain. Duligen, who has been a recipient of this kindness, stole some plates, which he surmised would command a handsome price in the market. But Kabunian learned about his evil intention. Out of anger, the chief god embedded him on a rock and only had Duligen's now monstrously large phallus protrude as a reminder that evil never wins.

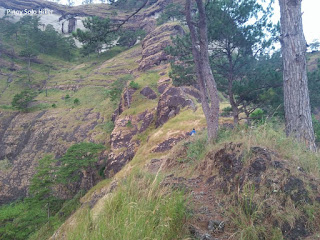
Some parts of the huge rocky mountainsides were used as a burial grounds, hence the presence of box coffins with human bones can be seen in some parts of the trail. Mt. Kabunian may not be that high but the trail can pose a great challenge to beginners most especially to those with serious acrophobia. With all honesty, it's one of the most dangerous trails I've ever been to. In fact, three of our colleague in the hike aborted the climb haft way through considering that they were all experienced hikers. 

The trail has a total distance of 7km from Poblacion to the summit (14km for backtrail). The hike starts with a 900ft descent to a flight of cemented stairs which then leads to a gorge. It signifies the gradual ascent passing through stairs hewn from a rocky portion of a mountainside with some safety railings placed to aid the hikers during ascend and descend since most part is a ravine. Upon further hiking, one will reach a rocky portion with loose rocks, and one can only imagine how perilous the trail can be during rainy days. From there on, one will pass a very narrow mountainside trail which is actually less than a foot in width composed of loose rocks and soil with nothing to cling on. It was just pure guts to cross this route because one wrong move and you'll be hurtling down the mountain. Then comes the stairs hewn from the rocks which are very steep, thus safety railings were also placed to help the hikers which are approximately 200ft ascend where it features steep cliffs and rock drop-offs. It then leads to a hanging bridge that leads to the final 500ft steep assault to the summit that passes rocky mountainside trail for a total of 2400ft elevation gain from the jump-off point. Throughout our hike, there was a strong gushed of winds that were constantly challenging our every step which was comparable to 80km per hour (It was both scary and creepy as if the winds were mystical in origin. It miraculously stopped when decided to descend from the summit).

Pinoy Solo Hiker - Mt Kabunian
The very scenic trail

Pinoy Solo Hiker - Mt Kabunian
The summit at the other side 

Pinoy Solo Hiker - Mt Kabunian
Team Una ng LAQBAI at the summit (Photo credit: Ron Dubois)

Pinoy Solo Hiker - Mt Kabunian
The final 500ft assault to the summit


Pinoy Solo Hiker - Mt Kabunian
The short hanging bridge before the final assault

Pinoy Solo Hiker - Mt Kabunian
Photo credit: Ron Dubois

Pinoy Solo Hiker - Mt Kabunian
The perilous trail which is less than a foot wide

Pinoy Solo Hiker - Mt Kabunian

Pinoy Solo Hiker - Mt Kabunian

Pinoy Solo Hiker - Mt Kabunian
The descent going back to jop (Photo Credit: Kiko San Luis)

Pinoy Solo Hiker - Mt Kabunian
Groupie muna s trail  (Photo credit: Kiko San Luis)

Pinoy Solo Hiker - Mt Kabunian
#GwapoBeLike (Photo Credit: Ron Dubois)

Pinoy Solo Hiker - Mt Kabunian
@The summit: Emer, TenTen, Erwin, Ron & Kiko

Hike date: Dec 15, 2017
***Special thanks sa mga nakasama ko sa hike na ito: Sir Emil, Mam Rita, Ate Bing, Mommy Daisy, Ten-Ten, Erwin, Reigner, Kiko and Ron Dubois and the rest of LAQBAI.

Tuesday, February 26, 2019

Aling Taleng's Halo-Halo

One of the most sought after "Halo-Halo" in Pagsanjan and even in the whole Laguna, Aling Taleng's Halo-Halo has been in the business since 1933. 

Unique as it seems, instead of using "leche plan" and "ice cream" as their topping, they use sweetened "kundol" instead. They also use other ingredients such as white and red beans, macapuno, ube halaya (purple yum), and some preserved fruits mixed in crushed ice and of course with a generous mix of evaporated milk which made it popular among locals and foreign tourists alike.

They also serve various Filipino dishes like "Puto Bumbong" as their other specialty. Their short orders for lunch and dinner are a little bit pricey with little amount of serving and no distinct taste to make it special. I can recommend them for "Halo-Halo", but for the other food on their menu, that is a different story.

On the otherhand, the place is a little bit cozy with dim lighting. The ambiance is nostalgic because of the paintings and pictures that are displayed on the wall. 

Pinoy Solo Hiker - Aling Taleng's Halo-Halo

Pinoy Solo Hiker - Aling Taleng's Halo-Halo

Pinoy Solo Hiker - Aling Taleng's Halo-Halo

Pinoy Solo Hiker - Aling Taleng's Halo-Halo

Pinoy Solo Hiker - Aling Taleng's Halo-Halo

Pinoy Solo Hiker - Aling Taleng's Halo-Halo

Pinoy Solo Hiker - Aling Taleng's Halo-Halo

Address: 169 General Luna Street, Pagsanjan